How to Store Grain Effectively: 7 Essential Tips for Grain Storage & Moisture Management

Table of Contents
- 1. Tip 1: Dry Grains to the Recommended Moisture Level
- 2. Tip 2: Clean Grains Thoroughly Before Storing Them
- 3. Tip 3: Clean Storage Bins and Equipment Thoroughly Before Use
- 4. Tip 4: Use Proper Aeration Systems to Control Grain Temperature
- 5. Tip 5: Monitor Stored Grain Conditions at Regular Time Intervals
- 6. Tip 6: Choose Suitable Sealed and Pest-Resistant Grain Storage Structures
- 7. Tip 7: Inspect Stored Grains Regularly for Insects and Fungal Growth
- 8. Common Mistakes People Make When Storing Grain
- 9. Conclusion: Protect Your Grain Quality with Proper Storage Practices
- 10. Frequently Asked Questions (FAQs)
Tip 1: Dry Grains to the Recommended Moisture Level
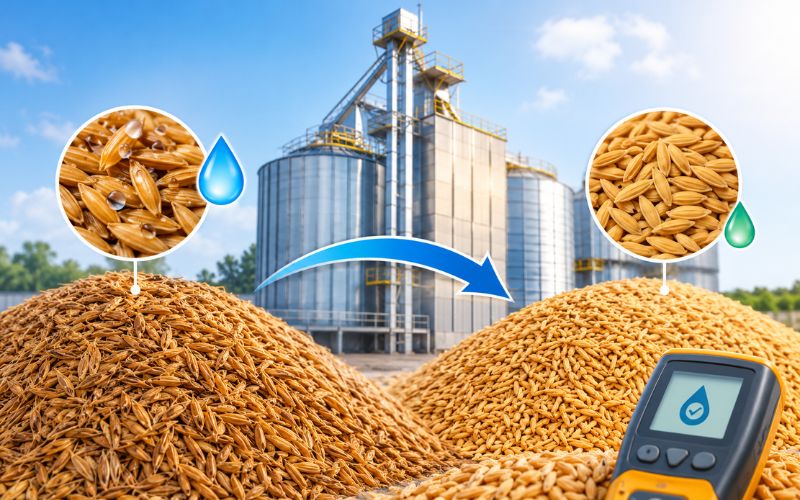 Most storage problems start here. People fill bags, bins, or silos before checking whether the grain is actually dry enough, and grain that feels dry on the surface can still hold enough moisture deep inside to cause trouble later. If you've ever wondered, "How do I store grain without losing it to mould or insects?", the first move is always to dry it to the right moisture level.
- Wheat: Wheat should generally be dried to about 12.5–13.5% moisture for safe storage. At higher moisture levels, it becomes vulnerable to mould, heat pockets, and insect activity, particularly in warm and humid conditions.
- Paddy and Rice: Paddy is commonly dried to around 14 to 15 percent moisture, while milled rice needs to be drier, about 12 to 13 percent. Rice that is stored too wet can discolour, develop off odours, and lose quality during storage.
- Maize: Shelled maize should be dried to roughly 13 percent moisture for ordinary storage. For longer or reserve storage, aim closer to 10 to 12 percent. Maize is especially prone to mould when it enters storage above the recommended level.
- Millets, sorghum, and pulses: Requirements differ by crop, so don't treat every grain the same. Millet can often be stored at up to about 15 to 16 percent moisture, while sorghum is usually kept closer to 13.5 percent. Pulses and beans have their own limits.
Tip 2: Clean Grains Thoroughly Before Storing Them

| Grain Condition | Why It Matters | Recommended Cleaning Method |
|---|---|---|
| Dust and chaff | Can affect grain quality and storage hygiene | Use aspiration and air-based cleaning |
| Stones and soil | Increase impurities and affect processing | Use sieves, screens and pre-cleaners |
| Broken and damaged grains | Can reduce overall grain quality and encourage spoilage | Use grading and screening |
| Weed seeds and unwanted particles | Reduce grain purity and market value | Use sieving and size-based separation |
| Insect-damaged grains | Can affect the quality of the stored batch | Use proper screening and grain sorting |
Tip 3: Clean Storage Bins and Equipment Thoroughly Before Use

Storing clean grain in a dirty storage bin defeats the whole purpose of cleaning it. Dust, leftover grain, insect eggs, and mould from previous storage cycles can contaminate fresh stock and lead to spoilage. So before loading a new batch, make sure the storage space and equipment are properly cleaned. This is one of the simplest steps to prevent storage problems.
Start by emptying the bins, silos, or storage containers. Remove leftover grain, husk, dust, and other debris from the floors, walls, corners, and discharge outlets. Pay extra attention to cracks and hidden spaces where insects and old grain can remain unnoticed.
Now clean the equipment. Check conveyors, bucket elevators, augers, hoppers and grain handling pipes. Remove any stuck grain, dust, or residue that could mix with the new batch. Inspect the equipment for rust, oil leaks, damaged parts, and signs of insect activity.
Mind the moisture, too. Avoid unnecessary water during cleaning, and if wet cleaning is required, allow all surfaces to dry completely before loading grain. Check for roof leaks, blocked ventilation openings, and damaged seals. A clean and dry storage environment helps reduce the risk of mould growth, pest infestation, and grain spoilage.
Tip 4: Use Proper Aeration Systems to Control Grain Temperature

Maintaining the right grain temperature during storage doesn't happen automatically. As grain sits in storage, temperature differences can cause moisture to move inside the grain mass, creating conditions for mould growth, insect activity, and spoilage. A proper aeration system helps manage these temperature changes by circulating air through the stored grain. Here's what you need:
- Aeration fans: Move air through the grain bulk to maintain a more uniform temperature.
- Perforated aeration ducts: Distribute airflow evenly across the bottom of the storage bin.
- Temperature monitoring cables: Measure grain temperature at different depths and identify hot spots.
- Moisture monitoring equipment: Helps track changes in grain moisture during storage.
- Air inlets and outlets: Allow proper airflow through the storage structure.
- Automatic fan controls: Help operate fans according to temperature and weather conditions.
A small note on aeration. Running fans continuously doesn't always improve grain storage. The incoming air should have suitable temperature and humidity conditions for the grain. Using warm or humid air at the wrong time can increase moisture problems instead of reducing them.
One more tip: aeration is not the same as grain drying. Its main purpose is to control grain temperature and maintain more uniform storage conditions. Choose the fan capacity, airflow rate, and operating schedule according to the grain type, storage depth,h and local climate. Regular temperature checks also help you identify hot spots before they turn into bigger storage problems.
Tip 5: Monitor Stored Grain Conditions at Regular Time Intervals

Stored grain needs regular attention, and knowing what to check during storage can make the difference between maintaining grain quality and facing avoidable losses. The golden rule is to monitor temperature, moisture, re and pest activity at regular intervals. Even a small change in conditions can encourage insects, mould, and spoilage. Check regularly and take action before the problem spreads.
- Temperature changes: Grain temperature plays an important role in preventing spoilage. Ideally, keep stored grain cool and stable, preferably around 10–15°C where practical. Check temperatures every two weeks during warmer conditions and monthly during cooler conditions. A sudden rise of 2–3°C in one area can indicate insect activity or moisture build-up.
- Moisture levels: Use a grain moisture meter to check samples from different locations. For long-term wheat storage, moisture below approximately 13% is generally preferable, depending on storage conditions and duration.
- Insects and pests: Inspect grain for weevils, beetles, mites, damaged kernels,els and unusual dust. Pay particular attention to warm areas, where insect activity may be higher.
- Unusual smells and visible changes: A musty or sour smell can indicate moisture problems or spoilage. Look for mould, discolouration and caking, particularly around storage bin walls and upper layers.
- Inspection records: Record temperature, moisture readings,ings and inspection dates. Comparing readings over time helps identify developing problems before they affect the entire grain lot.
Tip 6: Choose Suitable Sealed and Pest-Resistant Grain Storage Structures
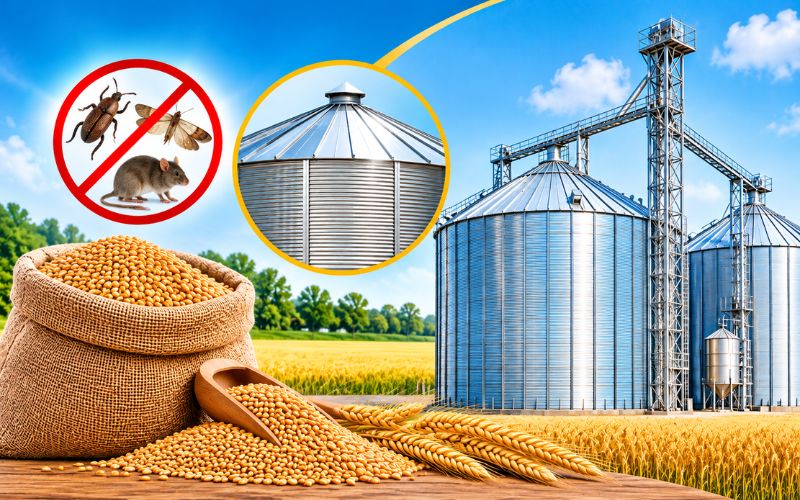
The right storage structure makes a big difference in keeping your grain safe and maintaining its quality. The golden rule is to choose a storage option that protects grain from moisture, insects,r rodentss and changing weather conditions. The best choice depends on how much grain you store and how long you plan to keep it.
- Metal or steel silos: If you store grain in large quantities, metal silos are a practical option. They provide good protection against outside weather and pests when properly maintained. Make sure doors, joints, and openings are tightly sealed to prevent insects and rodents from entering.
- Hermetic or airtight storage: For better protection against insects, airtight bags and containers can be a good choice. They limit oxygen inside the storage and help control insect activity. Just make sure your grain is properly dried before sealing it to avoid mould growth.
- Food-grade storage bags: If you store smaller quantities, choose strong, moisture-resistant bags that can be sealed properly. Keep them on pallets instead of directly on the floor to protect them from dampness.
- Check seals and entry points: Regularly inspect doors, cracks, joints and ventilation openings. Even small gaps can allow insects and rodents to enter, so make sure they are properly protected.
Whatever storage option you choose, keeping it clean and dry and properly sealed is equally important. A suitable storage structure helps protect your grain quality and reduces the chances of unnecessary storage losses.
Tip 7: Inspect Stored Grains Regularly for Insects and Fungal Growth

Regular inspection is one of the simplest ways to protect stored grain from insects and fungal growth. Small problems can go unnoticed at first, but if left unchecked, they can spread and affect grain quality, cause losses, and make the grain unsuitable for use.
Make it a habit to inspect stored grains at regular intervals. Look for signs such as live insects, larvae, webbing, unusual odours, discoloration, or visible mould. Pay extra attention to areas where moisture may collect, including corners, walls, and the top surface of the grain. If you notice any unusual changes, investigate the cause and take appropriate action before the problem spreads.
Temperature and moisture conditions also play an important role. Keep the storage area dry, maintain proper aeration where suitable, and check for water leakage or condensation. Avoid disturbing affected grain unnecessarily, as this can spread insects or fungal contamination to other areas.
Even well-dried grain needs regular attention once it enters storage. A little monitoring at the right time can help prevent bigger problems, reduce storage losses, and maintain grain quality for longer.
Common Mistakes People Make When Storing Grain
Storing grain is not just about keeping it in a bin or warehouse. A few common mistakes can lead to insect infestation, fungal growth, ur moisturee damage, and significant storage losses. Watch out for these:
- Storing grain without checking moisture content: Excess moisture encourages mould growth, insects, and spoilage. Check moisture levels before storage and dry grain to the recommended level for its type and storage period.
- Using unclean storage bins or equipment: Leftover grain, dust, and debris can carry insects and contaminate a fresh batch. Clean bins, floors, and handling equipment before filling them.
- Ignoring proper aeration: Poor airflow can create warm spots and moisture pockets inside stored grain. Use a suitable aeration system to maintain more uniform grain temperatures.
- Mixing new grain with old or infested grain: Insects and fungal contamination can spread to fresh stock. Inspect existing grain and clean the storage area before adding a new batch.
- Skipping regular inspections: Insects, unusual odours and mould can go unnoticed until significant damage occurs. Check grain samples, moisture and temperature at regular intervals.
- Using unsuitable storage structures: Leaking roofs, cracks and poorly sealed openings allow moisture and pests to enter. Choose clean, dry, and properly maintained storage facilities.
The key is to remember that good grain storage starts before the grain enters the warehouse. Proper drying, cleaning, aeration, and regular monitoring can help maintain grain quality and reduce avoidable storage losses.
Conclusion: Protect Your Grain Quality with Proper Storage Practices
Knowing how to store grain effectively mostly comes down to three things: maintaining the right moisture levels, keeping storage areas clean, and choosing suitable storage conditions. Dry grains properly, monitor temperature and moisture regularly, and take timely action against insects, mould, and water leakage. Whether you're storing wheat, rice, maize, or other food grains, these simple practices can help preserve grain quality and reduce storage losses over time. Good grain storage starts with the right preparation and continues with regular monitoring throughout the storage period.
We will be back with the next blog soon. Till then, stay tuned!